Entering Transaction Details
All transactions that effect a Value item, such as payments, insurance
adjustments, write-offs, and interest charges, are tracked in the Value
Transactions window. Amounts entered in the Transaction Details will cause
the Total Adjustments, Total Payments, and Due fields in a Value item
to be recalculated. A list of transactions from the Value Transaction
window will display in the read-only Transactions
Details section of a Value item.
The Transaction Details section will be read-only and the
Add button disabled when the Provider field is blank for a Value item.
Adding
a Transaction
To add a new transaction,
- If on the Value List View and two or more transactions
already exist for a value item, clicking on the transactions icon
 will open the Value Transactions
window. Use the Click
to add row to open a new row for data entry.
- If on the detail view of a Value item, click the Add icon
 next
to the Transaction Details section heading or double-click a transaction
item in the Transactions Details list to open the Value Transactions
window. If this is the first transaction to be entered for the selected
Value item, the Transaction Details window will open with a new row
inserted. Otherwise, use the
Click
to add row to open a new row for data entry.
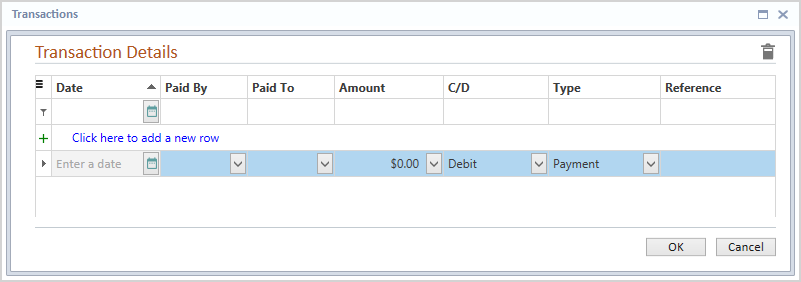
- Enter the date of the transaction in the Date
field or click on the calendar icon
 to select
a date
from the calendar pop-up.
- Select the category of the Payor from the Paid
By dropdown, which is populated from the Paid
By Mini Directory. Paid By information is used to summarize where
payments are coming from and is used in reports and settlement memos.
- Select the category of the Payee from the Paid
To dropdown, which is populated from the Paid
To Mini Directory. Paid To information is used to summarize where
payments are going and is used in reports and settlement memos.
- Enter the dollar amount of the transaction in the Amount money
field. Click the calculator icon
 to calculate the total amount, if needed. Positive credits and
negative debits will display red using your computer’s regional negative
currency format.
- The C/D column is automatically populated with the C/D
setting defined in the Paid By Mini Directory when the Paid By option
is selected. However, if no Paid By is selected or you wish to override
that selection, click the C/D dropdown and select whether the transaction
is a Credit or Debit.
- The Type column is automatically populated with the default
option Payment. Click the Type
dropdown to select Adjustment, if appropriate. If no Paid By is selected,
changing the Type column to Adjustment will cause the C/D column to
change to Credit and changing the Type to Payment will cause the C/D
column to change to Debit.
- Enter any additional information in the Reference
text field, such as the check number or other method of payment. When
using the QuickBooks SDK interface with Needles, the Reference field
is automatically populated with check number or void information when
a check is printed or voided from QuickBooks.
- To add additional payments or adjustments, use
the Click
to add row to open a new row for data entry.
- Click the OK
button to save your transactions and close the Value Transactions
window. Clicking Cancel will
close the window without saving the new transactions.
The Total Adjustments, Total Payments, and Due fields of the Value item
will be recalculated based on the amount and type of the saved transactions.
Modifying a Transaction
To modify an existing transaction,
- If on the Value List View and two or more transactions
already exist for a value item, clicking on the transactions icon
will open the Value Transactions
window.
- Double-click a Value item on the List View to open the
detail view and click the Add
icon next to the Transaction Details
section heading or double-click a transaction
item in the Transactions Details list to open the Value Transactions
window.
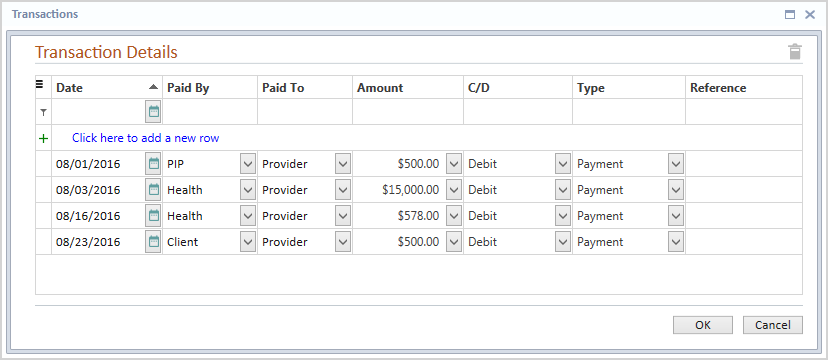
- Make the appropriate change(s).
- Click the OK
button to save your changes and close the Value Transactions window.
Clicking Cancel will close
the window without saving the changes.
Certain fields will update automatically based on the modifications
made:
- The C/D column will be set to the C/D default
setting designated for a Paid By Mini Directory entry when the selection
in the Paid By column is changed.
- The C/D column will be set to Credit and the
Amount column updated accordingly if the Paid By field is blank and
the Type field is changed to Adjustment.
- The C/D column will be set to Debit and the
Amount column updated accordingly if the Paid By field is blank and
the Type field is changed to Payment.
- Total Adjustments will be recalculated when
the amount of an Adjustment transaction item is modified.
- Total Payments will be recalculated when the
amount of a Payment transaction item is modified.
- Total Due will be recalculated.
Deleting Transactions
To delete transaction items,
- Click to select one
or more rows to be deleted in the Value Transactions window .
Use
CTRL + CLICK to select multiple rows.
- Click the Delete icon
 located above the upper right corner of the grid in the Value Transactions
window. The following deletion warning message will display to confirm
the deletion.
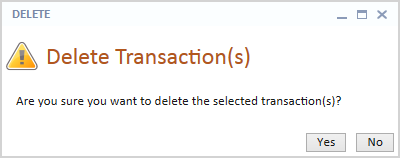
- Click the Yes
button to remove the selected transactions, OR click the No
button to cancel the delete process.
- Click the OK
button to save changes and close the Value Transaction window. Clicking
Cancel will close the window
without saving the changes.
- Click on the Save
button on the Case ribbon to save changes to the Value item.
The Total Adjustments, Total Payments, and Due fields of the Value item
will be recalculated removing the deleted item(s) from the total amounts.
Saving Transactions
After changes have been entered in the Transaction Details window, click
the OK button to keep all
changes. Then, click the enabled Save
button on the Case ribbon to save all changes to the Value item. However,
if changes have been made and you attempt to select another Case Folder
tab, close the Case Folder tab window or close Needles, you will be prompted
with a save changes warning message.
You may decide to abort the recent changes by using
this method.
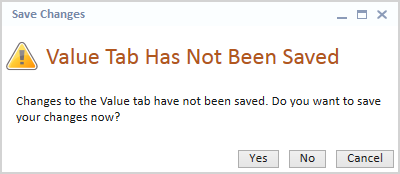
- Click the Yes
button to save your changes.
- Click the No
button to abort your changes.
- Click the Cancel
button to return to your recent changes.