Creating an Accounting Link
In order to exchange information between Needles and QuickBooks SDK,
Parties and Providers in Needles need to be linked to Customers and Vendors
in QuickBooks. This section details how to create and change those links.
A user must have proper permission
to add/modify an Accounting Link.
When QuickBooks SDK has been configured, an Accounting Link button will
display in the Interfaces group on the Party Tools ribbon when on a Party
tab or on the Provider ribbon when on the Provider tab of a Provider.
To create an accounting link,
- Go to the Party tab or Provider tab for the name to be
linked.
- Click the Accounting
Link button
 to display
the QuickBooks <Customer/Vendor>
Search Window. In the example below, with a Provider selected, the
QuickBooks Vendor Search window is displayed.
- Enter the first few characters of the desired name in
the search field to locate a QuickBooks Vendor that can be linked
with the current Provider. You may also click the Search
 icon to retrieve all QuickBooks Customers/Vendors.
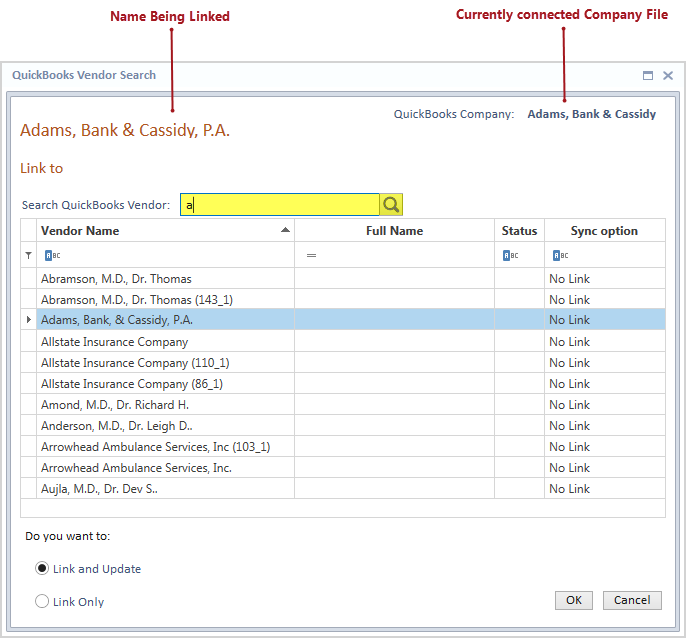
If you are using more than one
company in QuickBooks, ensure that the active company is correctly displayed
in the upper right corner of the Search window.
- Select the QuickBooks Customer or Vendor that matches
the current Party or Provider in Needles.
- Choose the link type at the bottom of the window.
- Select the Link and Update option
if you wish to link the current Needles name to the selected QuickBooks
name and allow name and contact information to be updated between
the two programs. This is the default option if the “Allow address
changes of Customer and Vendors” option is selected on the QuickBooks
SDK tab.
- Select the Link
Only option if you wish to only link the two names. Check
and deposit information will still sync, but name and contact
information changes will not.
- Click the OK
button to create the link. If Link
and Update is selected, you will see a warning message to update
the linked item.
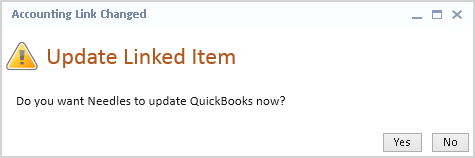
- Click the Yes
button to update the linked QuickBooks Customer/Vendor fields
with the current Needles Party/Provider information.
- Click the No
button to abort the update. This option will change the sync to
Link Only.
The next time the QuickBooks <Customer/Vendor>
Search Window is opened it will display the current link status of the
Party/Provider to a Customer/Vendor in QuickBooks. The Status column will
display the  icon when linked.
Mousing over the icon will display an “Already linked with” tooltip.
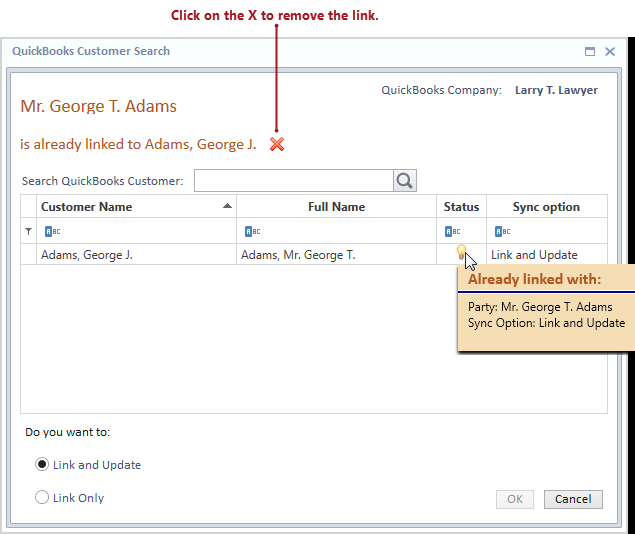
- To remove the link, click the red
 icon at the top of the QuickBooks <Customer/Vendor> Search Window.
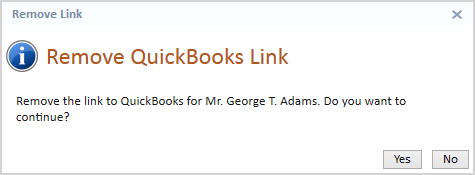
- Click the Yes
button to remove the link with the QuickBooks Customer/Vendor.
The link will be removed and return you to the search window where
you may link to another QuickBooks Customer/Vendor or close the
window by clicking the Cancel
button.
- Click the No
button to abort the link removal.
- If Party/Provider is selected to link with a QuickBooks
Customer/Vendor that already links to a Needles name, a QuickBooks
MultiLink message will display.
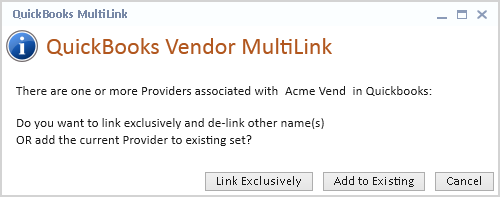
- Click the Link
Exclusively button to allow the current Party/Provider to
be linked with the selected name from QuickBooks and remove the
link of the existing Needles name.
- Click the Add
to Existing button to add the current Party/Provider to the
existing set of linked names. a QuickBooks <Customer/Vendor>
MultiLink Information window will display with a grid
listing all of the Party/Provider names linked to the selected
QuickBooks Customer/Vendor. The Sync Option for each link will
also be listed. Sync options may be changed by clicking the desired
cell of the Sync Option column and choosing either Link
Only or Link and
Update from the dropdown.
- Click the OK
button to save all changes or
- Click the Cancel
button to abort changes and return to the QuickBooks Search
window.
- Click the Cancel
button to abort the linking process and return to the QuickBooks
Search Window.