Modifying a Note
To modify a Note in a case,
- If the last Note is not the note needing modification,
click the View List button
on the header band to return to the list of Case Notes. Once in the
Notes
Tab List View, double-click the row of the note requiring changes
to open it.
- Click on the Calendar icon
 or click
into the date
field to enter a different date or a new time if needed.
A future date is not allowed
and will trigger a validation warning.
- Click on the Staff
dropdown listing to change the Staff Code.
- Select a Topic
from the dropdown list to change the Note Topic. Topics are defined
in the Case
Note Topics Mini Directory. The Topic field is required, and a
validation warning will display when attempting to save a note without
a Topic.
- Enter any changes to the desired note
text into the text field. If rich text is enabled, click on
the Display as Rich Text button
to convert the note text to rich text. Apply any rich
text formatting as desired. Use the spellchecker on
the note text by clicking the Spellcheck icon
 on the Quick
Access Toolbar.
- If the note is already in rich text and you wish to convert
it back to plain text, click on the Display
as Plain Text button
 on the header
band. The Display as Plain Text warning message will display to warn
that all rich text formatting will be lost and the changes cannot
be reversed.
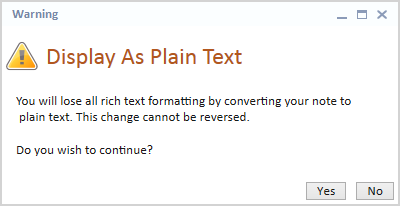
- Click Yes to continue and convert the rich
text to plain text.
- Click No to cancel the conversion and leave
the note text as rich text.
- If you have elected to use the Case Status tab in the
case type and it includes Note information, the Case Status check
box will be available. Click on the Case
Status check box to select information from this Note to be
displayed on the Case Status tab.
- Click on the Save
button on the Case ribbon to save changes to the Case Note.
- Click on the View List
button to return to the list of Case Notes.